HOW TO MUG – PART 2

Tutorials

Hello lovely People of the internet!

I have been away for quite some time, and in the last blog post I promised you a follow up tutorial to show you how to use the mold we made in that tutorial.

So here we go:

You will need:

  • clay
  • a ball-tool
  • some tiny knives

MUG-1

First you have to fill up the mold with your clay.

Then remove the clay you don’t need with a knife.

MUG-3

I even removed a bit from the center, so it will easier to form it in the next step.

For the next step you’re going to take your ball-tool, and push the clay into so mold to hollow it out.

When you do this, clay will push up, which you have to remove again.

MUG-4

Use the knife to remove the excess .

MUG-5

Hollow it out even more, until you’re happy with the shape.

MUG-6

MUG-7

Now it is time to put in in the oven for around 10 to 15 min. You want to bake it a shorter amount of time, since you will have to bake it again later on!

MUG-8

When it is ready, let it cool off, and then pop your shape out.

MUG-9

Usually the edges will be uneven, so I take my knife again, to carefully remove more excess and make it smooth.

MUG-10

MUG-11

MUG-12

MUG-13

When your cup is ready we can move onto making the handle for the mug.

Roll out some clay in a thin shape.

MUG-14

Cut it even thinner.

MUG-15

Cut it to the length you will need.

MUG-16

Since our cup is already baked, it is pretty easy to attach it to the inside of the cup.

MUG-17

MUG-18

MUG-19

If it is well attached, move it around, and attach the other side to the outside of the cup.

Don’t press to hard! We want the outside to look fine, and not like the inside.

MUG-20

MUG-21

When you’re ready, you can start adding the tea or coffee or any other drink you want to fill your cup with.

I started by filling the cup with Liquid Clay.

Then I used pastels and a knife to sprinkle some fine powder over the top.

MUG-22

MUG-23

Mix it in using a toothpick!

MUG-24

Well…and then you’re ready!

MUG-25

Now all you have to do is bake it again in the oven for another 20 min. and tadaaaaaa, you’re done! Yeah!

xo,

Lola Who

P.S.: I am planning on blogging more often again!

Wish me luck!

How to Cup with Mold Putty – Part 1

Uncategorized

Oh man what a day!

Nearly forgot that I promised you a little tutorial today! It is super small.. but hopefully super effective :P. Also, I have decided to make this a series, so, this is the second Part of my short and quick tutorials all around Mold Putty.

So, on Tuesday I reviewed Amazing Mold Putty and showed how to use it.

Now there are a lot of ways to use it, for example does it make your life so much easier if you have a mold of a thing you make a lot. I have a lot of cupcake bases that I made myself.

Another thing I use/need fairly often are plates or cups. Plates are easy to buy, but cups are a problem, as they’re either too big or to small, or if they’re attached to a plate already you can’t use them to make a mold.

If you’re into making miniatures you also might stumble across different sized miniatures, so one sized (cup) doesn’t fit all. (When does one size fits all ever work right?)

So here is a simple way of making a mold for mugs in any size and shape you want.

You will need:

  • Amazing Mold Putty (duh)
  • clay
  • (ball tool) or back of a pencil

LEEEEETS BEGIIIIIIIIIN

Roll a bowl of scrap clay and then start by making a cone or dome.

thumb_IMG_8940_1024

Make sure to make it a good shape and also try to leave no fingerprints. The cone has to be smooth so you don’t have to correct each of your replicas. That is just so so annoying believe me. ( I know my pictures are great)

thumb_IMG_8941_1024

When you’re happy with your shape take a pencil or ball tool and use it (the back) to make an indent in your cone/dome.

This will assure your cup stands.

thumb_IMG_8942_1024

Now it is time to bake your cup! Really important!

After baking and cooling down you can get the mold putty to make a mold.

I have explained those steps in my review about Amazing Mold Putty so I will not explain it again.

thumb_IMG_8945_1024

And this is the finished product!

thumb_IMG_8946_1024

If you want to know how to use this mold now and how to make not only cups but mugs, be sure to follow my blog so you won’t miss the last quick tutorial on how to use Amazing Mold Putty next week!

xo

Lola Who

…Amazing Mold Putty – A Review…

Lola thinks about..

Hello you!

To keep up with my original schedule, I am going to present you a review on the “ AMAZING MOLD PUTY“.

If you’re unfamiliar with this magical tool, this will make your day (hopefully).

All the others who have already had the chance to use this magnificent tool can hopefully agree with me that it is our duty to introduce everybody to it!

Let me explain:

Mold Putty is a two component silicone-mold-making…-putty..

Wow great explanation. 😀

Maybe it will be easier to show you:

These are the two components that you need to mix together.

1

To make a mold you first need to have something you want to make a mold of ready, and next to you. Then you need to take equal sized amounts of the yellow and white putty.  Rolling them into little balls usually help. You also don’t need to be too fast with this, as the putty won’t dry so fast before you mix it.

2

When you have decided on your amount of putty, don’t forget to keep the size of your object in mind,  it is time to mix the too.

Now starts the timer of 3 MINUTES!!!

Mix fast and well!

3

For it into a ball, this is an easier technique.

4

Then take your object and press it gently into the putty mix.

5

Press it down carefully until the sides are in the mold.

6

If your object has delicate pattern, press the mold a bit harder on those places.

7

Also, never cover your object to deep in the mold, when you use the mold with clay the clay should get easily out of the mold, without ruining the shape again. The only way to use those kind of molds is to bake them with the clay in the oven. This is possible without releasing toxic gas.

After you you’ve finished, it’s time to wait 20 minutes. That’s at least what it says on the instructions. Personally I find it better to wait an hour or so before using it.

8

11

12

When taking it out your mold should look like this :

13

14

This is the end result. Now you can fill the mold with clay and make more ice-cream cabochons for example!

Amazing mold putty is a great tool to use! It is ridiculously easy to use and makes crafting so much easier!

Unfortunately it is only available in the US, not in Europe, so buying it here over at amazon or so will  result in the set being a bit more expensive. I know about other mold making sets that are available in Europe, and if I ever get the chance to use those I will do a review. For now I am super happy with this set!

In the next post I will show you how to make a mold of an object that you made yourself with clay. So stay tuned! (?)

xo,

Lola Who

Jammin‘ around – A tutorial

Tutorials

I AM ALIVE!

So sorry for being gone for so long. I was just missing motivation. It’s still not fully back, but I guess I can’t sit around and wait for it to finally come back. Let’s keep busy!

This mini tutorial is from last month when I made the tiny food trays.

Unfortunately it’s not completed so you have to imagine how it good be finished.

Also, not sponsored by nivea ^^, just didn’t notice it was in frame, and now I am honestly to lazy to cut it out of the picture.

So letssssss staaaaaaart:

You will need:

  • clay in a jam colour
  • translucent clay
  • TLS
  • a ball tool

First mix your jam color with some translucent clay but not to much. This way your glas will look kinda realistic.

I am using translucent red clay, so if you’ve got that use it.

Then proceed to make little balls, flatten them, so you’ll have tiny cylinder shapes.

You can also roll the clay into snakes to what ever wideness (?) you prefer.

(can be easier! my clay was to old and broke trying this)

thumb_IMG_8779_1024

Then roll translucent clay into a snake of the same width, and attach it to the other color after you have made clean cuts on both sides!

thumb_IMG_8780_1024

thumb_IMG_8781_1024

To „fuse“ both colors together roll the clay in your hand, don’t worry if it gets wider and or thinner, you can always push it back into its shape.

thumb_IMG_8782_1024

thumb_IMG_8783_1024

thumb_IMG_8784_1024

thumb_IMG_8785_1024

After you have decided on a width and height you can begin to make a dent. Using ball-tools will make this ridiculously easy. If you don’t have one you can use the end of a pen or something. Just make sure its plastic, or you might risk taking paint off of that pen.

thumb_IMG_8786_1024

thumb_IMG_8787_1024

Now it’s time to make the „jam“.

I mixed translucent red and TLS together.

Then put it inside.(twss)
thumb_IMG_8788_1024

thumb_IMG_8789_1024

thumb_IMG_8790_1024

I also wanted to make tiny spoons. I made those by simply rolling out silver clay, cutting it in small strikes and then using a ball tool to make a spoon like end. I then added more „jam“ to them.

thumb_IMG_8793_1024

Now.. this is where my pictures end, but here are some pictures to show you where you could use those tiny jam jars.

You can also add tiny labels!

thumb_IMG_8837_1024

thumb_IMG_8846_1024

I hope this was in anyway helpful to you!

xo

Lola Who

Heart Cake Tutorial – Polymer Clay

Uncategorized

Today I am going to show you how to make this super adorbs Heeeeeart Cake! Wooooh!!!

So let’s start!

You will need :

  • Any clay you prefer
  • Some tools like tooth picks, knife, (cookie cutter )
  • either : limo liquid or TLS or acrylic colors or deco sauce.
  • Glue and magnet if you want a fridge-magnet

Ok, let’s start now.. that we have all the materials!

Roll out some clay and cut out a circle! With a knife or a cookie cutter.

thumb_IMG_8768_1024

thumb_IMG_8769_1024

Make a ball of clay in a color of your choice and flatten  it slightly.

Than cut out a heart shape! Make sure the cake is tall enough though!

thumb_IMG_8770_1024

Place the cake on the circle!

thumb_IMG_8771_1024

Then use left over clay  of the same color, flatten it out and cut little pieces which you can put next to your cake, so it looks like you just cut off the fondant part of the cake.

thumb_IMG_8774_1024

Now we have to make the little piping bag! Choose the same color that your frosting will be later!

Form a ball and make on side really thin!

thumb_IMG_8775_1024

Then flatten out the wider side!

thumb_IMG_8776_1024

Then do the same thing for the nozzle!

thumb_IMG_8777_1024

Attach the two parts!

thumb_IMG_8778_1024

Now it would be time for the oven, if you own deco-sauce or acrylic paint, if you don’t have those, make sauce using TLS and apply it before baking! Here is a little tutorial!

thumb_IMG_8805_1024

After baking it is time to add the frosting!

thumb_IMG_8806_1024

I painted my design on with a pencil.

thumb_IMG_8807_1024

thumb_IMG_8809_1024

Then I squeezed some sauce onto scrap paper and used a tooth pick to apply the frosting!

thumb_IMG_8810_1024

thumb_IMG_8812_1024Then I added some other deco sauce to make decorations on the side of the cake.

thumb_IMG_8816_1024

thumb_IMG_8817_1024

thumb_IMG_8820_1024

Now we have to make a wrapper for the piping bag! I used a small plastic bag I found.

thumb_IMG_8821_1024

I cut out a square from one side, that placed it onto the piping bag to check the size. Do this until you’re happy with the size!

thumb_IMG_8822_1024

I applied some glue to make the wrapper stay!

thumb_IMG_8823_1024

thumb_IMG_8826_1024

Wrap it!!

thumb_IMG_8827_1024

Tie the bag together using some yarn or other tiny string!

thumb_IMG_8828_1024

thumb_IMG_8830_1024

Add a magnet ! And you’re finished! Add glaze if you want.

thumb_IMG_8832_1024

thumb_IMG_8833_1024

thumb_IMG_8886_1024

thumb_IMG_8889_1024

thumb_IMG_8890_1024

thumb_IMG_8892_1024

thumb_IMG_8893_1024

I hope you enjoyed this tutorial!

You can also look on my etsy if you’re interested in this item!

xo

Lola Who

Tiny Cookie Tray Tutorial

Tutorials

Hello Lovelys!

Today I am going to show you how to create a quite simple miniature food tray, which you could either use in a dollhouse or as a fridge magnet.

You will need:

  • Clay in ‚tan‘, ‚white‘, ’silver‘ (optional), ‚pink‘ and ‚chocolate‘
  • Fimo Liquid or TLS
  • Some tools

Let’s begin!

thumb_IMG_8713_1024

First you need to warm up and then roll out the silver clay!

This will be our baking tray!

thumb_IMG_8714_1024

thumb_IMG_8715_1024

thumb_IMG_8716_1024

Yes I am using a water bottle to roll the clay out.

thumb_IMG_8717_1024

Now cut out a rectangle.

Then use the left over clay to cut out thin stripes. Those will be our tray border.

thumb_IMG_8718_1024

thumb_IMG_8719_1024

thumb_IMG_8721_1024

thumb_IMG_8722_1024

Use another stripe and a ball tool to make a spoon!

thumb_IMG_8723_1024

thumb_IMG_8725_1024

Put everything aside and begin to mix a tan and brown color to get a woodlike appearance.

thumb_IMG_8726_1024

thumb_IMG_8727_1024

thumb_IMG_8728_1024

Roll it out and cut another rectangle. You can make it bigger than the other one if you want to.

thumb_IMG_8730_1024

thumb_IMG_8731_1024

When you’re ready put it aside. Now we can start to make the bowl.

I have made myself a bowl mold. If you don’t know how to make a bowl here’s a Bowl Tutorial that I find helpful. If you wan’t to know how I made the mold, let me know in the comments.

thumb_IMG_8732_1024

Basically, what I do here is: I fill the mold with clay, cut off the excess and then use a ball tool to make a dent. Then I cut off excess clay again.

thumb_IMG_8733_1024

thumb_IMG_8735_1024

Put it to the side!

Now we have to make the cookies!

Take your tan colored clay and roll it out!

thumb_IMG_8736_1024

I use a tiny heart stencil to cut out hearts, but you can also do it free hand.

thumb_IMG_8737_1024

thumb_IMG_8738_1024

After you’ve cut out the hearts, it is time to make the glaze that goes on the cookies!

Mix pink clay (or whatever color you prefer) and Liquid Fimo or TLS!

thumb_IMG_8741_1024

I used a flat tool to mix as I find it a lot easier this way!

thumb_IMG_8743_1024

Now you can start putting the cookies onto the tray!

thumb_IMG_8744_1024

thumb_IMG_8745_1024

thumb_IMG_8746_1024

I don’t think you can see it really well on the pictures, but I put some glaze on each cookie!

thumb_IMG_8748_1024

thumb_IMG_8749_1024

thumb_IMG_8750_1024

As you can see I left 3 cookies outside of which 2 have been glazed and one is still naked.

Pick up the tray and put it onto the other rectangle. Don’t forget to add some TLS as it workes as a glue between the two layers!

thumb_IMG_8751_1024

thumb_IMG_8752_1024

Now it’s time to put the other cookies onto the tray. Use Liquid or TLS again to ‚glue‘ it together.

As you can see I also added some glaze/frosting to the bowl and to the spoon.

Leave the bowl in the mold until after baking.

If you didn’t use a mold it is a good idea to glue the bowl onto the clay without frosting and then bake it for a few minutes. Let is cool down and add the frosting. This way you won’t ruin your bowls form. Then bake it for the missing time.

thumb_IMG_8753_1024

After baking you can start to clean it!

thumb_IMG_8796_1024

thumb_IMG_8797_1024

thumb_IMG_8798_1024

Use a small knife to go around the bowls edges if they’re wobbly in any way.

thumb_IMG_8800_1024

Then use super glue to glue it onto the tray!

thumb_IMG_8801_1024

Let it dry! Then turn it around to glue magnets on the back if you want to.

thumb_IMG_8804_1024

And this is the finished product!

Cute!

thumb_IMG_8884_1024

I hope you try out this tutorial or at least found it interesting!

xo

Lola Who

…a Creative Crisis…

Lola thinks about..

..or is what I am doing useful in anyway?..

Today I wanted to address a problem, which I was struggling with some time ago. You can read about some of those concerns here

I wanted to bring it to the table again, because I saw one of my fellow miniature makers questioning herself in the description of an instagram picture.

And I don’t mean, she was asking herself a question, no no.. She was questioning in which way her work was useful.

And that is when it hit me. Others in my field of art are also thinking the same! (One is never really alone, but everyone always thinks that instead of asking others if their having the same doubts/thought/troubles..smh)

Because of that I thought I’d write a blogpost to maybe help out others who are having similar thoughts.

So is making miniatures useful?!

Not in the literal sense of the word. A miniature literally just sits in a corner and catches dust.

But if that is a criterium for being „not-useful“, than there are a lot of things and jobs for that matter which could be useless.

We are unfortunately fortunate, to have the privilege of living in the first world. A world filled with wealth, so filled in fact that people need things to show they are wealthier than their neighbor. So they buy jewelry..and later electronics.. or expensive porcelain and silver cutlery…

All things that are rather unimportant and not really useful..they’re mainly for entertainment.. ok, yes you need cutlery at some point of the day..but does it have to be silver?

New jobs appeared out of nowhere to fill privileged peoples wishes.

And having a dollhouse is one of those wishes.

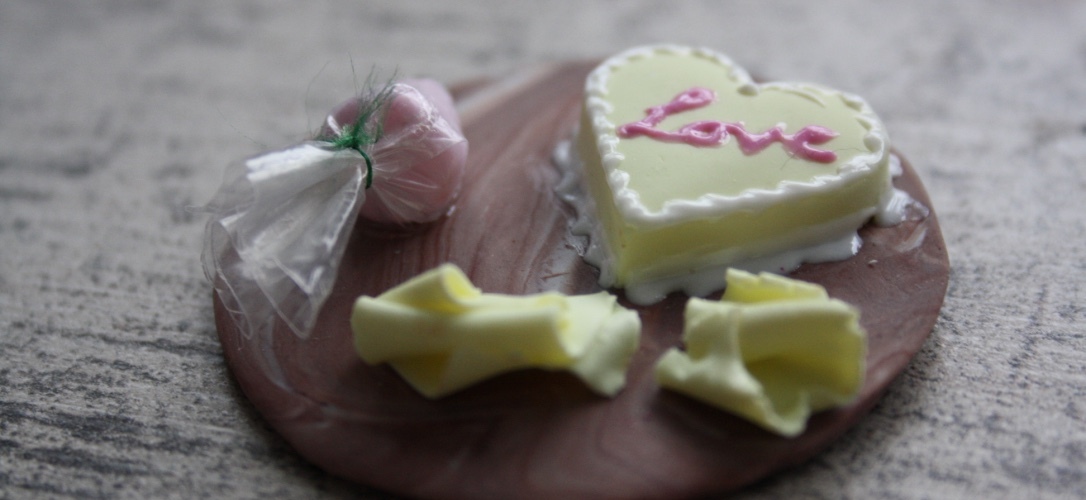
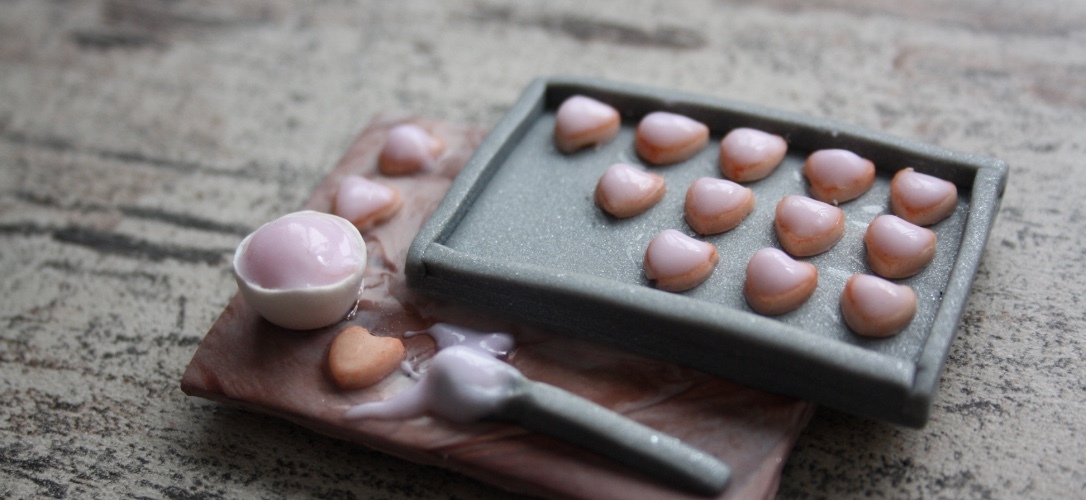
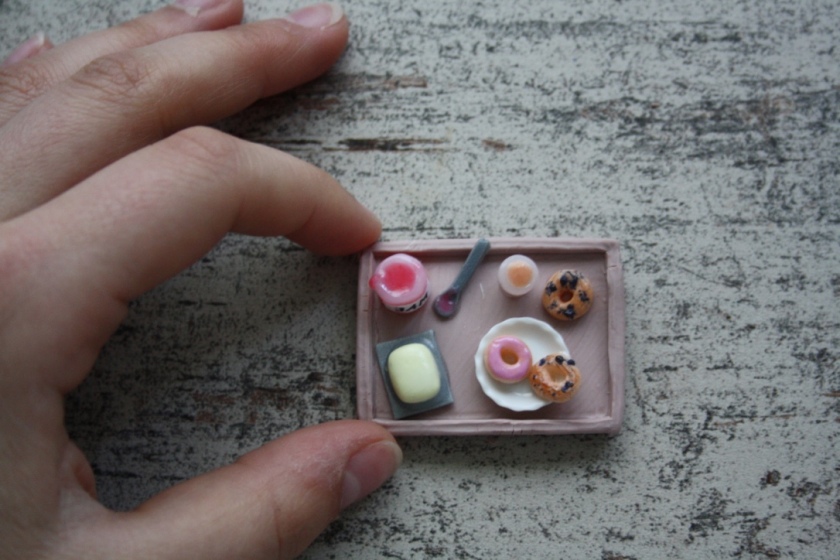
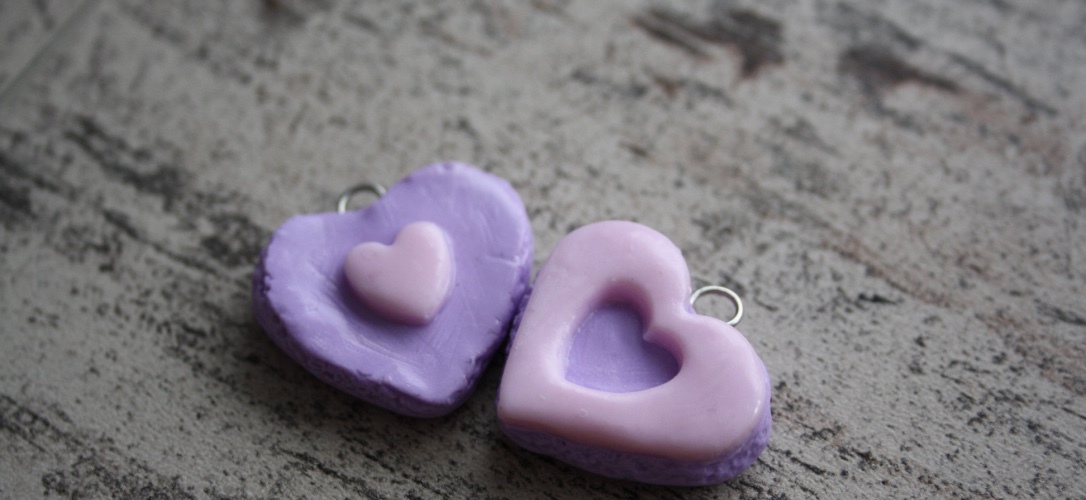
A dollhouse filled with tiny miniature foods.

So..there is a need for it right? Because some people are asking for it.

But is it..“useful“?

No. That is at least my opinion. Yeah sure your work might make someone happy.That#s a ‚useful‘-trait. But that isn’t really what you want the answer to this question to be, is it?

NO it’s not helpful in a way that you’re helping poor Children in need. Your work is not curing diseases or solving world hunger.

But you know what. So is a lot of work! And you’re privileged to live in a place where people want to buy miniature food (jewelry) and making those people happy has/is a purpose. So stop complaining!

For me personally it was never in sight to be anything else than a art person. In our world they’re is no need anymore for certain jobs, but on the other hand there is a need for different new jobs f.e. Digital Design.

And yes it is weird thinking that you can’t really save the life of your neighbor if something ever happened to them.. But a lot of people can’t do that. You’re not the only one!

A film that I really recommend, which also touches on this topic is : „Hector and the Search for Happiness“ . The movie has a whole lot to say in general. Definitely a ‚must-watch‘.But basically it’s about a psychologist who’s looking for what makes people happy. And at one point he asks whether or no his profession is actually of need.

Let’s put it like this:

If what you’re doing makes you and other people happy than that’s a good thing! Even if the happiness comes from being a privileged brat who is able to spend their life doing something they really really love. Like Crafting.

If this thought is still bothering you, look into project that you could help out or donate a certain % of each item you sell to a charity that you like.

That’s at least what I am doing at the moment. Looking for a project.

Let’s help out in our area. We can’t all be doctors without borders. Mostly because we are no doctors…

But there was another answer to the original question which was left by a different lovely ‚colleague‘ who replied to her saying something around the lines that Art is never useless or unnecessary…

Which is definitely a way to look at the topic.

Personally, as someone who is studying Art (oops ikr) I do believe that there can be useless art which isn’t really saying anything. There is a reason why a lot of modern and contemporary art is provocative and really important for our society.

I like to look at art with the question..does it change anything? And a lot of the times it does..in my way of thinking for example. Or even looking at it in a certain way.

Is miniature food.. changing anything? Yeah. I guess it is changing work techniques. And interests of people. And all in all..clay as it is gives everyone a great creative outlet. But does miniature food change our society in any way? Mostly not I believe. But does it have to? Maybe..maybe not..That depends on your own views of Art and what you expect to get out of it.

But the whole ‚What is Art‘-Discussion is a whole different book.

So let’s get back to the point.

If you’re feeling like your work is useless or unnecessary in anyway change that! In a way that gives you enough reason to continue what you’re doing.

For me that is indeed looking for an organisation to help out, and always remembering : There are people I bring joy to in this world. And if I am not working for those few people what would be the purpose.

Stay happy people! And don’t suppress thoughts. Find solutions to your problems and solve them.

xo,

Lola

..On tiny cake trays..

Lola looks back...

This week I finally got around to use my magnets for the purpose I bought them for.

I made tiny cake or food trays that you can put on your fridge!

Here are some picture:

thumb_IMG_8837_1024

thumb_IMG_8840_1024

thumb_IMG_8843_1024

thumb_IMG_8850_1024

thumb_IMG_8872_1024

This is the only cake tray you will see for now, I have made a tutorial for another one that I will upload on Thursday!

thumb_IMG_8853_1024

thumb_IMG_8857_1024

Making these was a lot of fun!

And I’ll be selling these! Make sure to follow my shop on etsy to see when I put them up for sell!

xo,

Lola Who

My Work Routine or a Heavy Exposition

Lola thinks about..

Today I am going to tell you a bit about my usual routine while I am working on my miniatures.

At the moment I squish it in between university and work, but my time problems are not what I want to address today.

I watch TV shows. A lot of TV shows.

It’s embarrassing. Well at least it’s better than my youtube obsession that I used to had, but which ended (thankfully) about a year ago, or even before that, when most of the community fell into some content shit-hole. BUT that’s a whole other story (to be told, idk, maybe)

Back to my TV Show problem.

When working I usually have to have my eyes glued onto my miniature, so watching the program doesn’t really work.

So, over the time I have discovered certain shows that don’t really require constant looking as they tell you the whole story and what is currently happening in the dialogue.

To help you understand this phenomenon, I have a little video for you that I found online which explains it quite well. Please ignore the gross ending.

If I talk to people about this and they’re also a fan of the show they get offended quite a lot. Understandable, but I am actually complementing the show here. What would I do without those shows? Listen to audio books?! ( I do that, no worries, at the moment listening to LOTR first book).

Not every show can be a visuell master piece. The way the story is told depends on the viewers as well.

Let’s take one of my favorite shows f.e.. Please remember that’s my personal opinion based on observation.

I love Pretty Little Liars. It’s a great show. It’s mysterious, and I can watch it while working. If you know the show you’re probably wondering what I am referring to. There are indeed a lot of wood running and hiding in the woods, and yes you kinda have to watch this to see the next mysterious shadow person. But the producers prepare you for that. Most of the show is talking and a lot of exposition to inform the viewers about details they might have missed. I think it’s a good concept for a mystery show. Especially since the main audience is relatively young.

So I am definitely not trying to make fun of it. The show works for me this way.

A show I can’t watch while working is Doctor Who (also my favorite show, so I’d never do anything besides) but thats mainly because of the doctors accents, especially the current one. Scottish accent is still pretty hard for me to understand.

I guess a lot of exposition is a sign for ‚badness‘ ( can I.. can I say that?, don’t wan’t to google right now, hope you understand me) for a lot of people who claim to have knowledge in the field. It shows the lack of talent or work the director was willing to put in the movie, and decided that dialogue was the way to go, to tie open story lines together f.e.. Maybe cause it’s cheaper, what do I know.

I recently saw that in Pitch Perfect 2, a movie that is so dear to my heart because I love the first one, but that really made me sad. Might have been the translations though, so I have to see the movie again.

Yeah that’s my thought on this topic.

Here’s a list of shows that I watch while crafting:

  • Pretty Little Liars
  • Gossip Girl ( you might miss a sneaky paparazzi though)
  • 2 Broke Girls
  • Downtown Abbey ( but that’s because there is a lot of talking)
  • Psych (careful, you might miss a lot)
  • The Vampire Diaries
  • Great British Bake-Off ( for inspiration mainly)
  • and some more, I currently can’t think about.

I hope this helped you out !

Here are some audio books I have listened to in the past:

  • Sherlock Holmes
  • LOTR
  • The books of this movie about these monster hunters with Lily Collin and her real life bf in it.
  • Miss Marble

I would love it if you could recommend any audio books to me ! ( especially the ones I could find on youtube.. or anywhere else..*cough*..for free..*cough*

xo,

Lola Who

Macaron Friendship Charms – Tutorial

Tutorials

To celebrate today’s International Best Friend Day again, I will show you how to make these super adorable friendship macarons!

thumb_IMG_8756_1024 thumb_IMG_8759_1024 thumb_IMG_8761_1024 thumb_IMG_8758_1024

These are a bit more difficult, than my friendship charm tutorial from Thursday..

Also, I am using a mold I’ve made myself. If you don’t have molds, you can either cut the forms out with cookie cutters or do it by hand. If you’re new to making macarons, here’s a tutorial for mini ones, but it’s basically the same thing.

Other than that, you will need:

  • clay
  • cookie cutters or an exacto knife
  • pins!
  • glaze (optional)

So let’s staaaart :

thumb_IMG_8590_1024

My molds, and the clay ! I am mixing the cream for inside first, and use translucent and pink clay, but you can also just use pink one.

thumb_IMG_8595_1024

Fill the mold with another clay color of your choice.

Because I am using fimo effect, which is ridiculously soft, I let the clay sit in the mold for a bit, before I make the other macaron side.

thumb_IMG_8596_1024

Since I am waiting, I can prepare the other macaron, the round one.

thumb_IMG_8597_1024

thumb_IMG_8598_1024

thumb_IMG_8600_1024

Pop out the clay and put it to the side. Now you can make the other side.

thumb_IMG_8606_1024

I noticed that the edges weren’t defined enough, so I textured it a bit more.

thumb_IMG_8610_1024

Now you can roll out the clay from the start, and then cut a heart out or free hand it.

thumb_IMG_8611_1024

Make sure it fits!

thumb_IMG_8614_1024

I smoothed out the edges to make it rounder and the look creamer.

thumb_IMG_8615_1024

Now cut out a heart in the middle, or again do it by hand !

thumb_IMG_8616_1024

thumb_IMG_8617_1024

thumb_IMG_8618_1024

Put the cream onto the macaron in the mold. This way you won’t squeeze the other macaron side.

thumb_IMG_8620_1024

thumb_IMG_8622_1024

Then put the other heart onto the other macaron side.

If you want you can check carefully if the to sides fit, by putting them together lightly. But this can be tricky.

thumb_IMG_8626_1024

thumb_IMG_8627_1024

I took out the macaron out of the mold.

thumb_IMG_8628_1024

Now repeat the steps for the round macaron!

thumb_IMG_8632_1024

thumb_IMG_8633_1024

thumb_IMG_8634_1024

thumb_IMG_8635_1024

thumb_IMG_8636_1024

thumb_IMG_8638_1024

thumb_IMG_8639_1024

Yay! Done!

thumb_IMG_8641_1024

Now you can put in the pins.

thumb_IMG_8643_1024

thumb_IMG_8646_1024

thumb_IMG_8649_1024

Now lets bake !

After baking, you can remove the dirt and dust. Either use nail polish remover, or scrape the dust away with a knife.

thumb_IMG_8679_1024

thumb_IMG_8682_1024

thumb_IMG_8684_1024

When you are happy with your results you can glaze it !

thumb_IMG_8696_1024

I hope you enjoyed this tutorial and that you had a wonderful Monday!

And maybe you can recreated this tutorial for your best friend!

xo

Lola Who